Wednesday
Dec142011
 Post a Comment | tagged
  Post a Comment | tagged
 Thursday - My regular weekly summer jam in Bryn Mawr (~4 hours).
Friday - A friend hosted a nice dinner + jam; met some great new players, and got to play a sweet 1981 D-28 that had amazing bass response (~5 hours).
Saturday - The 82nd Old Fiddler's Picnic @ Hibernia Park (~6 hours).
Please pardon the typos (especially on letters from the left side of the keyboard); my fingertips are numb and my back is sore.
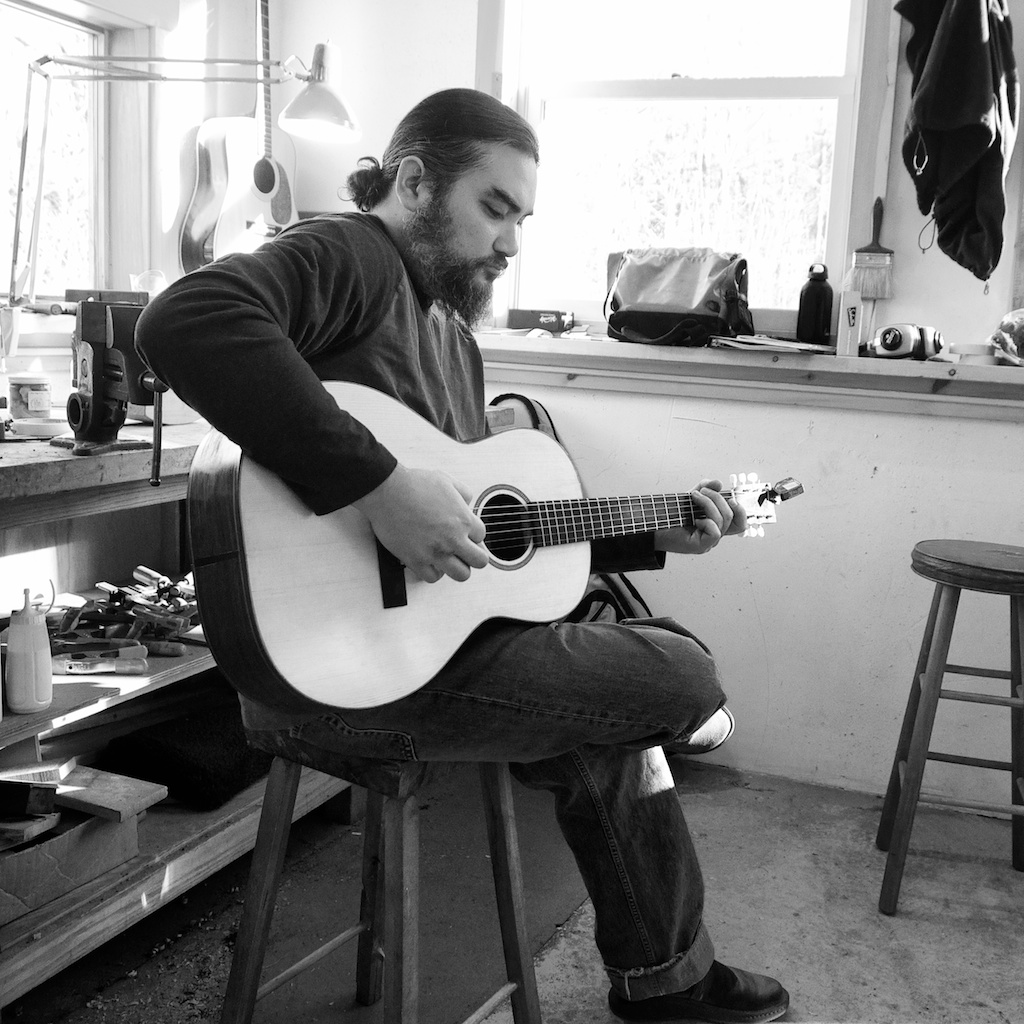
Post a Comment | tagged The video of Norman Blake I posted the other day has me thinking about my favorite guitarists. I'll just pick five for now, in no particular order:
1) Norman
2) Mark Knopfler (best headband award)
3) Richard Thompson (best beret award)
4) Jimi Hendrix (best tracksuit award; headband runner-up)
5) David Rawlings
Post a Comment | tagged Sadly, the summer is ticking away at a tragically fast pace. There's only one more week of the summer research season (students are funded to work in labs for 10 weeks), and then a month until the last minute crunch before classes start. My summer students have done really great work and I'm excited about their project and for the skills they've developed over the last nine weeks.
I'm teaching stats/methods in the fall and need to start working on that syllabus soon. Plus I volunteered for a "transdivisional seminar" during orientation week and have a stack of articles to review (i.e., peer review for journals). Oh, and those manuscripts I'm supposed to be writing. Sigh...Summer goes by way too fast.
 Last week we went to the U2 show at "the Linc" (Lincoln Financial Field); it was a good, not spectactular, show. But it was a nice summer activity and a good time with friends (other than the 90 minute traffic jam trying to get out of the parking lot). We saw U2 in Indianapolis 11 or 12 years ago, and I thought the band was tighter and more energetic then, but of course Bono and company are that much older now (and coming off of back surgery) so I suppose they should get some slack. The stage/screen was impressive and the band played most of the songs you'd want to hear, so all in all it was a good time.
Yesterday I went to the semi-annual Philadelphia guitar show (a.k.a., the Great American Guitar Show). It was smaller than when I last went a couple of years ago, and it's probably 70% electric stuff, so there wasn't too much for me to see. Plus it's pretty loud and hard to hear any acoustic guitars you might want to try out. But I did play a 1948 Martin D-18 that seemed pretty fantastic and a 1957 D-18 that was in really great condition that was also nice, but a couple other mid-50's D-18's didn't impress me as much. I'm starting to think a late-40's models is where it's at for me (since I can't affort a pre-war model!), if I ever get into the vintage game.
I also played a few late-40's to late-50's Gibson J-45's and SJ's, as well as a modern J-35 reissue, and didn't find anything that I was particularly impressed with. I've been wanting to play more Gibsons, but so far nothing has particularly resonated with me. Maybe I'm just more of a Martin guy.
Post a Comment | tagged 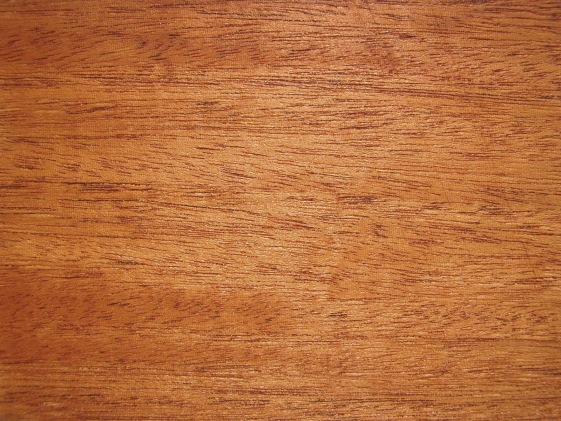 Image from: en.wikipedia.org/wiki/MahoganyThe two most common traditional tonewoods for the back/sides of guitars are mahogany and rosewood (with nods to maple, koa, walnut, etc). Typically, rosewood was the more premium and prized of the two; for example, Martin's flagship models like the D-28 and D-45 are rosewood, compared to the "entry-level" D-18. I've gone through my share of guitars, and I expect to go through many more, and I'm coming to realize that I'm a mahogany guy.
Two koa guitars have come and gone (Taylor 414K and Larrivée parlour in koa), three rosewood guitars are in new homes (1978 Larrivée L-11, Taylor 420R, Collings OM2HA), and a maple guitar (1977 Taylor 915) has moved on. Of course, a fair share of mahogany guitars have been traded/sold away (1995 Larrivée LS-05, 1990 Lowden S7c, 1976 Guild D-40SB, a Collings D1VSB, a 12-string Takamine N-10, Guild 12-string....I think it was an F-212 or similar) as well, but all of the guitars that are still around, except for one, are mahogany.
(read more about these guitars, and others, in my in-progress personal guitar history: Part 1 | Part 2)
I'm no good at describing tone, but there's something about the warmth and clarity of mahogany suit me. That doesn't mean I've totally sworn off other tonewoods, but if I had to wager on it, the next one will be mahogany!
Maybe next time we'll talk about sitka vs. adirondack spruce tops...Hint: I like both.
What a cool job: being a neck-fitter at Martin!
(this is an older article from the New York Times, but I just ran across it today)
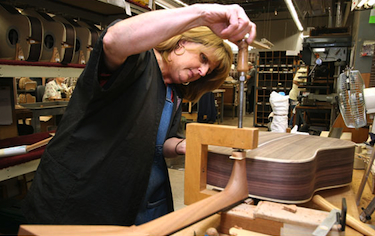 Photo credit: Jane Therese/The New York Times
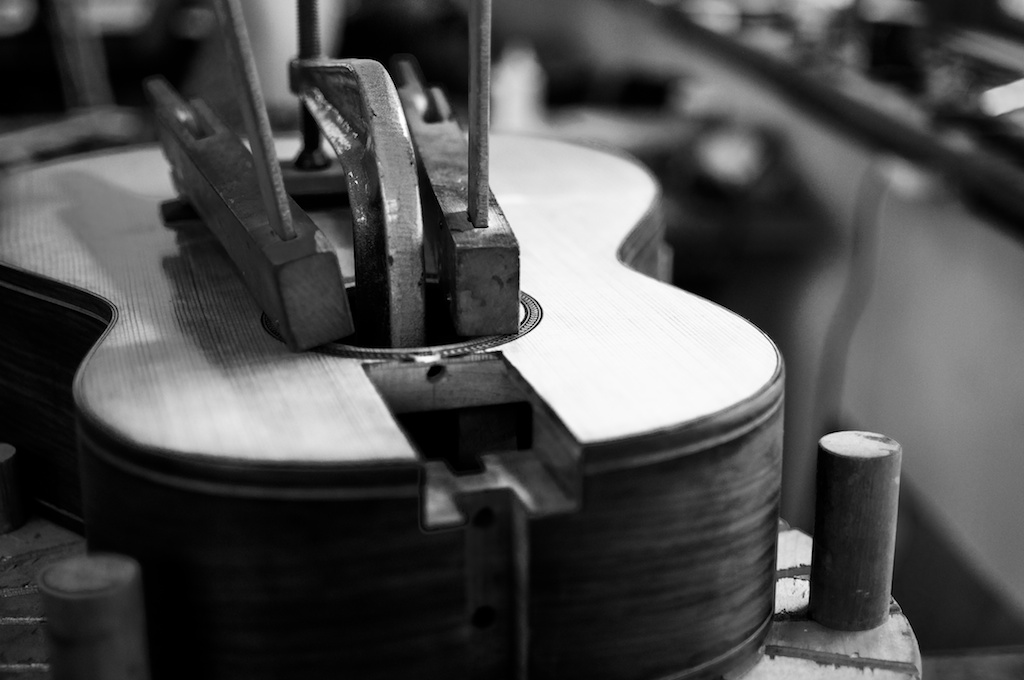
I just ran across this article and photo spread in Wired Magazine featuring Santa Cruz guitars. The photos are beautiful and it's a great write up of how Richard Hoover and the crew at SCGC approach their craft. If they called and offered me a job (doing anything associated with their company) I'd take it in a heartbeat. To live on the California coast and build guitars...how perfect would that be?
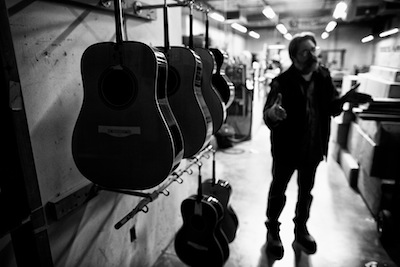 Photo credit: Jim Merithew/Wired.com
Post a Comment | tagged I've been in Philadelphia for ten years now, and I'm embarrassed to admit that today was my first visit to Vintage Instruments, which is a few blocks south of City Hall on Broad Street. When Acoustic Roots was in Bryn Mawr I didn't have much of a reason to go into the city to play guitars, but it's been gone for two and a half years now and I haven't found a new place to get my fix.
I was mainly interested in trying a set of Gibsons: a mahogany-topped "banner" 1944 J-45, a 1949 J-45, and a 1953 SJ. Unfortunately (for me, not for its new owner), the SJ had recently sold, so I went back and forth between the two J-45s for an hour or so. I had a clear perference for the '44; it was warm, with a good rumble in the bass, and had even tone across all the strings. It sported a huge neck; I guess this is the (in)famous wartime "baseball bat" neck that guitars of this era are known for. I tend to like big necks on my guitars, but this was a handful.
Even though I didn't go down there to play Martins, I couldn't help but give a trio of dreadnoughts a go: a 1948 D-18, a '49 D-18, and a '64 D-28. I love my D-18GE, with is loosely modeled after a 1934 D-18. The big winner of the day was the '49 D-18. It had a shadow of a second pickguard and a replaced bridge made from ebony (rather than rosewood); based on the playwear and new bridge, I suspected it was played by a lefty for many years. But it's back as a right-handed guitar and was warm and punchy like a good D-18 should be. Anyone have a spare $7.5k so I can bring the '49 D-18 home with me?
 1949 D-18...Photo credit: www.vintage-instruments.com (click to enlarge the image)
Post a Comment | tagged I know, I've been sharing lots of Collings videos recently. But I couldn't help myself with one more....Lyle Lovett talks about Collings and plays a tune.
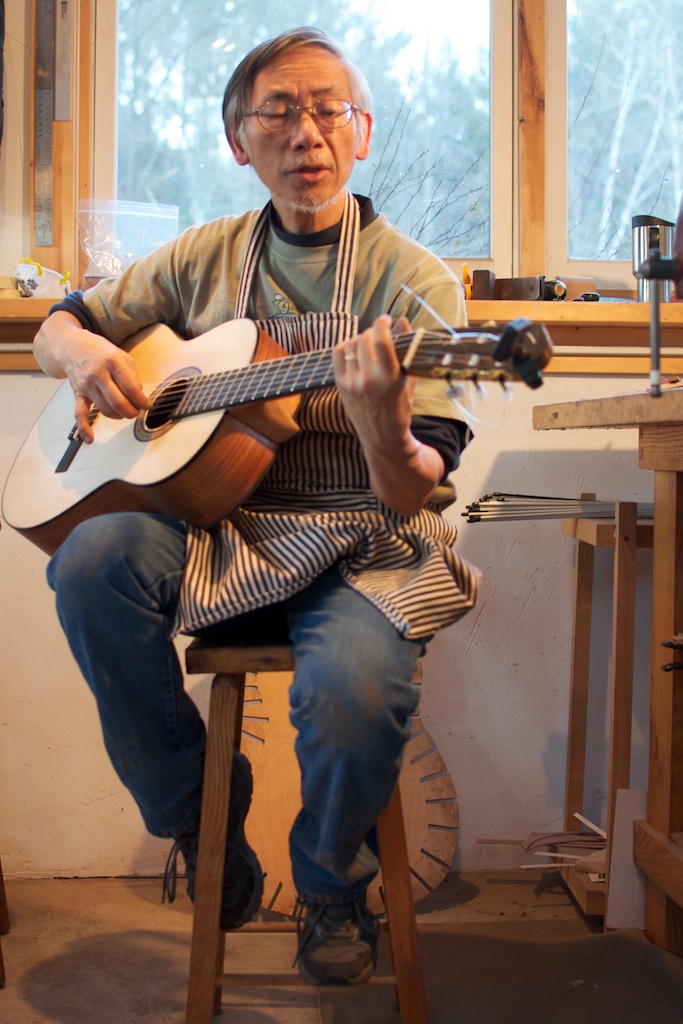
It's no secret that I love Collings guitars...especially the sunburst variety. I've loved sunbursts ever since my first "good" guitar, a 1976 Guild D-40SB that I bought at the little music store in Grinnell, Iowa, my senior year in college. That Guild has since moved on, but I still dig a good sunburst. And no one does 'em like Collings.
I've been living with my new guitar for about three weeks (the same amount of time it took it took to build it), and I've nicknamed it the "chubby little bear." Last night was my first opportunity to play it with other folks (thanks JD!), and it kept up just fine. Even though it's a "small" guitar, I think it was probably louder than the Sigma and Taylor dreadnoughts in the circle. It definitely had plenty of bass "whomp," but it's not muddy and each string has nice definition. The shorter scale makes it easy to play, although I'm still getting used to the 12-fret body.
A few people have asked me if it's my "favorite" guitar now. It certainly compares well to my others (a Martin and Collings), but has it's own unique voice. It sounds different, but just as good, as expensive small-shop (and factory) instruments. Guitars are like children (so I've heard)-- they each are different and you love them all equally. I don't have favorites, but I do feel really connected to this instrument.
The bottom line is that if you use quality materials, plan the design with care, and are attentive to the construction details, it doesn't take a pro to build a really fantastic sounding guitar. I'm looking forward getting to know #1 more in the months and years to come and to building #2 eventually!

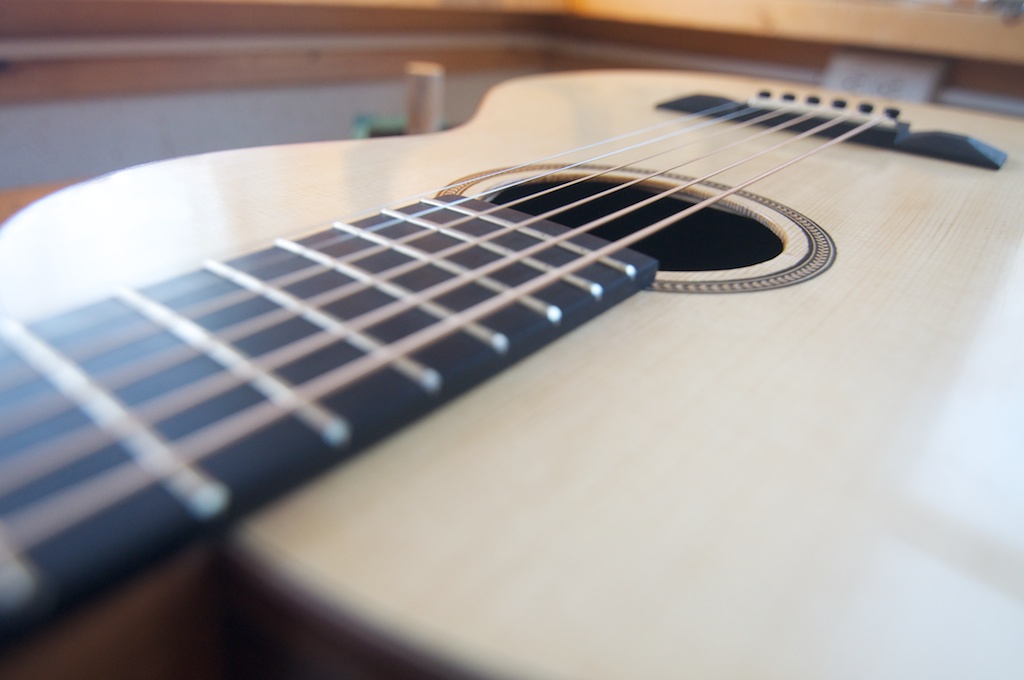
Nikon 35mm DX @ f/4.5, 1/500, on a Nikon D90. Converted with Nik Silver Efex Pro.
Post a Comment in photo of the week | tagged Man, I love Collings guitars. Kudos to Bill Collings and his crew for making some of the best guitars (and mandos and ukes) out there. This is a great short film about the Collings way of thinking about and building guitars.
Now that I’m home, I figured it was time to describe my new guitar in more details (i.e., give some specs). Warning, this info is probably only of interest to guitar weenies like me. At some point I'll do some detailed pictures.
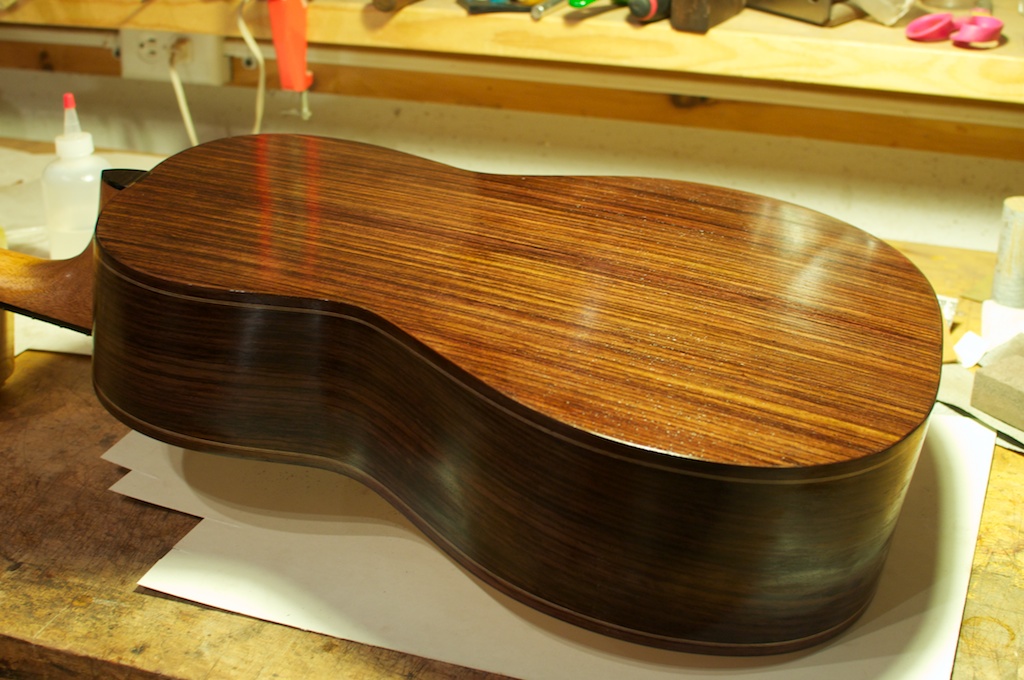
The best model name for this guitar (using Martin nomenclature) is a "00-21DB" (“double-oh-21-DB”). It’s based on Martin’s 12-fret (i.e., the neck connects to the body at the 12th fret), “00” size (14 1/8” across the lower bout), has rosewood back/sides with dark (i.e., not white) bindings like a stye “21” instrument, and has a deeper body than a standard 00.
The 00-21 is one of the first “modern” Martin designs, having been introduced in 1898. It was in continuous production for nearly 100 years, officially ending in 1996, but there have been some subsequent reissues (e.g., the 00-21GE “Golden Era”). Early models had an ebony bridge and fretboard, but in 1947 those were switched to rosewood. Like all standard rosewood Martins, the 00-21 switched from Brazilian to Indian rosewood in 1969, and in 1990 it got a solid (rather than slotted) headstock. [note: some of this info comes from Gruhn’s Guide to Vintage Guitars (2nd ed.) by George Gruhn and Walter Carter.]
Differences between mine and some of the features found on various incarnations of Martin’s 00-21:
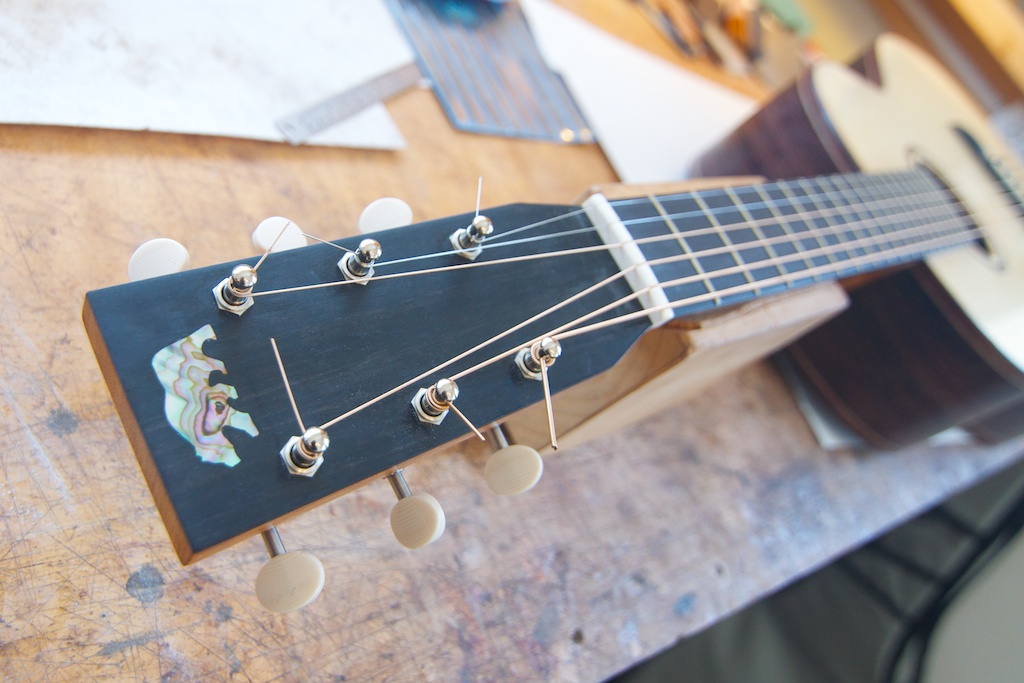
Nikon 35mm DX @ f/2, 1/320, on a Nikon D90. Converted with Nik Silver Efex Pro.
Post a Comment in photo of the week | tagged Epilogue: We left Vermont yesterday just before noon, after doing some last minute finish work on our instruments in the morning. I reattached the neck and fitted the slightly higher saddle that I had made the night before, so now I have a couple to choose from (i.e., higher vs. lower string action). The drive home was uneventful, which is good.
I’ve just tallied up the time spent working on my guitar; it’s just under 200 hours, or over 10 hours a day for 19 days (not counting the last minute work on the morning we departed). So if you’ve ever wondered why handmade guitars cost so much, let me tell you that they are a relative bargain given the artistry and work involved.
This course was such an amazing experience. I left Vermont with new skills, confidence, and interests, a bunch of new friends, and a beautiful instrument. Although there is an intense amount of work to do, George manages to keep the project on track and brings everything together so that we all converged with completed instruments on the last day of the class. I am also thankful for George’s patience; he never seemed to get annoyed by my “ask twice, cut once” approach. We worked hard but had fun doing it; it never seemed like labor and I enjoyed every minute of it (even the various screw ups that hit me [and every student in the class] periodically). And Pippa and George were wonderful hosts. The accommodations were very comfortable and the whole atmosphere was incredibly warm.
A couple of tips for future students who may stumble on this page prior to taking the course:
I realize that it’s weird to have an “about this series of blog posts” explanation at the end of the last post, but it’s something that just occurred to me to clarify: these post are not intended to document “how to build a guitar”; most of the pictures are simply of the results of each operation or day, not in progress shots. I was too busy working to be futzing with camera at every step.
I’m sure I’ll be writing more about my guitar in the upcoming days as I get to know it. For now I can say I’m incredibly pleased with the results of the course. I never would have predicted that I’d ever be able to do anything like this. It was an experience of a lifetime, and I’m grateful to have had the opportunity to learn from George, hang out with my fellow classmates, and spend time with my dad.
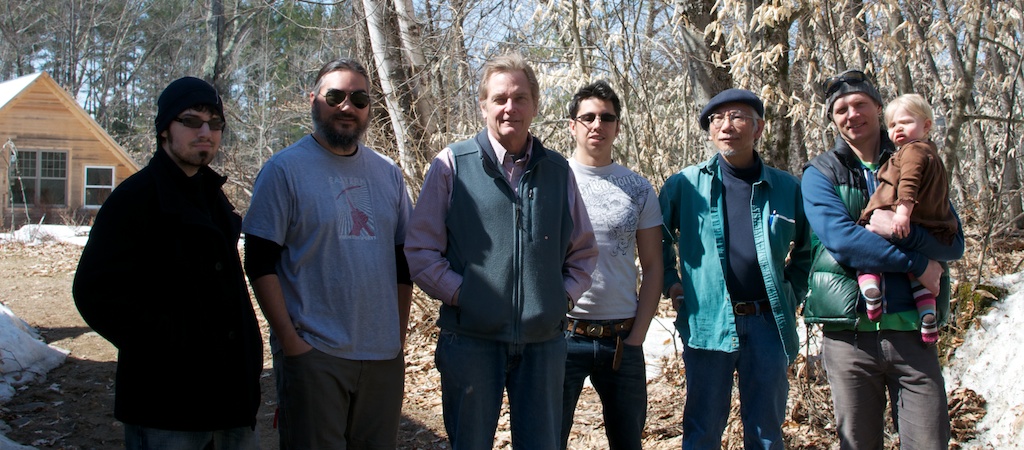 Our class (with the workshop in the background): Stefan, yours truly, George, Brendon, Chinh, & Matt (w/ his daughter)
Day 19: Today was a catch-all day. For some that meant catching up and getting a lot done. Luckily for me, it was doing a few smaller tasks as the final touches on my guitar. In the morning I polished out the finish on the back and sides a bit, and then worked on shaping the saddle and nut. This included learning how to do the intonation on saddle to make the guitar play in tune all the way up the neck. I also learned how to dress the frets (i.e., level and shape them). All of these are handy things to know; in many ways, setting up a new guitar is like maintaining or tweaking an old guitar, so I feel like I got a crash course in Guitar Repair 101 today.
Once all of this was done, I got to string my guitar up and play it (properly) for the first time!
Of course it didn’t stay assembled for long, and I took the neck off to install fret markers (small dots on the side on the fretboard at the 5th, 9th, and 12th frets) and also to do a few cosmetic touch ups. Everyone else was busy doing the final little tasks as well.
By dinnertime, everyone in the class had (at some point during the day) their guitars in playable condition, and we celebrated by having a final dinner at Holy Mackerel in Fairlee. Afterwards I went back to the shop and applied a couple of more layers of shellac before calling it a day.
The last full day of work stated at 7:30am and went until 9:45pm, with 45 minutes for lunch and a 2 hour dinner.
Tomorrow we head home, but in the morning I need to polish up my finish once more, reattach the neck, and string up the guitar for good (or at least until I decide to tinker with it some more). We’re leaving before lunch to drive back to Pennsylvania; I probably won’t feel like writing anything here tomorrow, but I’ll do a summary post in a few days.
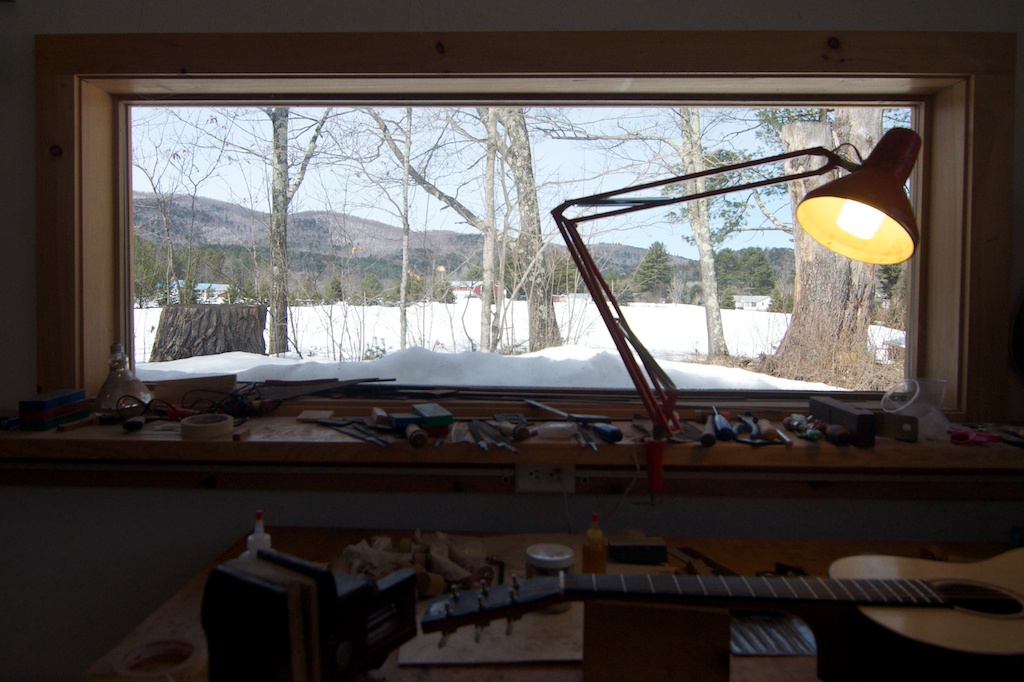
I'm looking forward to getting home, but I’ll miss the view from my workbench...
Day 18: Today was a busy day; seems like I always say that, but that’s the way it is around here. If you're not busy, you're not working hard enough. Since we’re coming down to our final day (tomorrow), we had lots of “little” but crucial things to wrap up today.
I started by sanding off the pore filler and then applying a couple of coats of shellac; the rosewood really looks great! The first troubleshooting that I did was work on getting my neck angle straightened out, allowing the strings to sit centered on the fretboard. This took a while, and I went through several possible culprits before coming up with a fix. It was a bit frustrating, but a good learning experience. Once the neck problem was straightened out, it was onto installing the tuners, which went pretty smoothly.

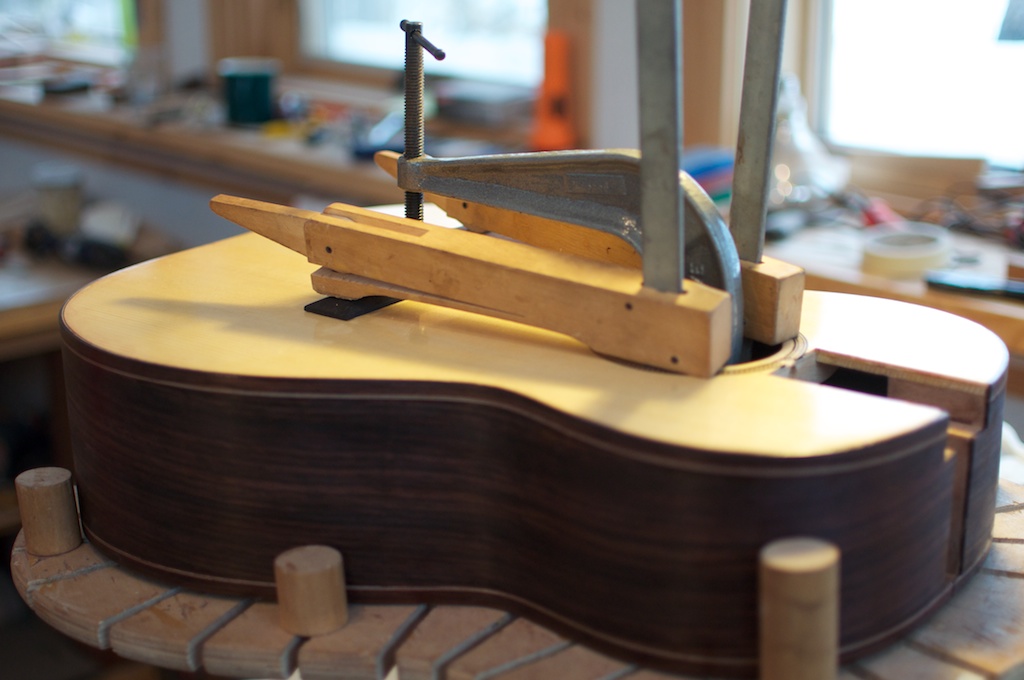
Then it was on to drilling holes for the bridge pins (you know you’ve been building guitars for nearly 3 weeks when you have no qualms about taking a power drill and 3/16th bit to the top of your guitar), and we could attach the high and low E-strings to see how things were sitting. Problem #2 encountered...My bridge was too tall (thus the action would be unadjustably high) so I had to plane off the top of the bridge.
Next came routing the slot for saddle. Given my previously foibles with the router and the fact that this was (I think) the last operation with a power tool that could wreck your guitar, I was a bit nervous. But George set up a clever jig that made this potentially fatal operation easy and painless. Once the saddle slot was cut, I made the bridge and cut the nut slots and strung the whole guitar up for the first time!
I won’t comment too much on the tone of the guitar yet since it was loud in the shop, and I haven’t set the guitar up yet (i.e., adjusting the action) so the strings were still too high. It did seem to sound good, but I pulled the strings off pretty quickly to do some other work (BTW, my dad also got his guitar strung up this afternoon...the first guitar in the class ready to be played).
The last thing I did was put some more shellac on the back and sides, before calling it a day. Today started at 7am, 45 minutes for lunch, and hour for dinner, back around 10pm.
Day 17: I started the day by putting a coat of shellac as a sealer on the back and sides; later in the day I applied pore filler to the back/sides. Rosewood has open pores that need to be filled if you want subsequent layers of finish to go on smoothly, so doing the pore filler is an important step. We also worked on the finish on the top of the guitar. It’s looking pretty good!
The two important operations for the day were shaping the neck and gluing the bridge in place. Up until today the neck was still a rectangular block that somehow needed to become round. I was really worried about how this would work; would I be able to carve it round? Of course, George had a clever way of doing this by having us measure and remove triangular pieces of the neck that were at a tangent to the target radius of the neck. It took some careful measuring and drawing lines, but overall it was pretty painless. I had grand plans of trying to duplicate the neck on my Martin D-18GE, but decided that I should just focus my attention on making a well-shaped neck rather than mess around with a custom neck profile.
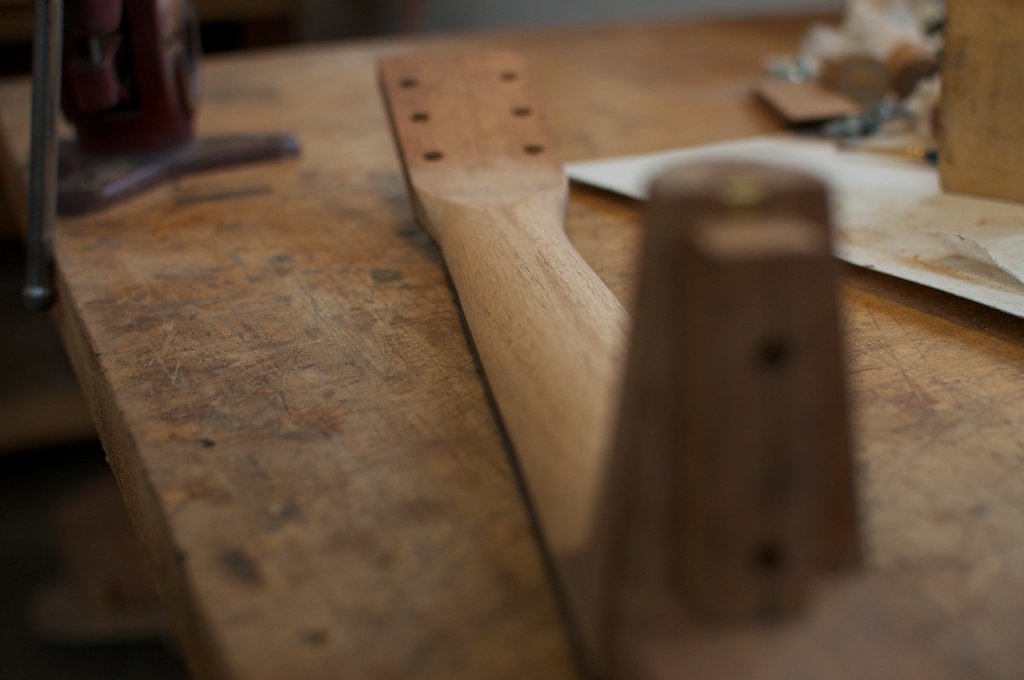
I especially liked using the spoke shaver, although that tool is so efficient for working on the neck that I only used it for a few minutes. Towards the end of the day I installed the heel cap, sanded the neck, and applied a few coats of shellac.

The other big task for the day was gluing the bridge into place. We had previously masked off its placement (so not to get finish there), but we still had to do some careful measuring for the location of the holes for the bridge pins and saddle. I discovered that my neck is slightly askew, so we’ll have to dial that in later to get everything lined up properly. I was pretty worried that this was a big screw-up, but George reassured me that we’d be able to correct it (my dad’s neck also had a similar problem, so there must be a genetic predisposition to be slightly askew...left-leaning, as it turns out). Gluing the bridge requires stuffing several large clamps through a small soundhole.
If I'm keeping track correctly, this is what's left (I won't even begin to guess which will be easier and which will be more difficult than expected):
 Matt with his maple #9-sized guitar
Went in at 7:00am, an hour for lunch, an hour for dinner, and done at 10pm.
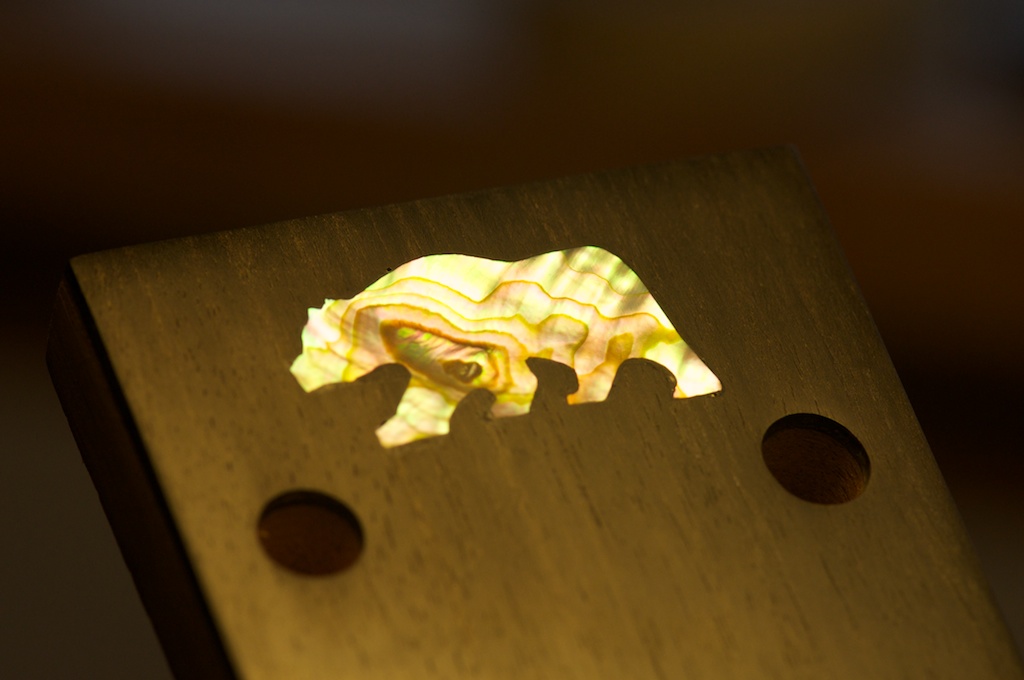
Post a Comment | tagged Day 16: I went in early today to finish my headstock inlay. At the risk of sounding immodest, it does look fantastic!

We started the day by continuing to do additional applications of shellac on the top. Working with the finish is a mixed bag for me. On one side, it is neat to see the guitar get all shiny and new looking. On the other hand, I like the look of worn in guitars, so having a perfect finish isn’t really that appealing to me, especially given the work it can take to get them looking that way.
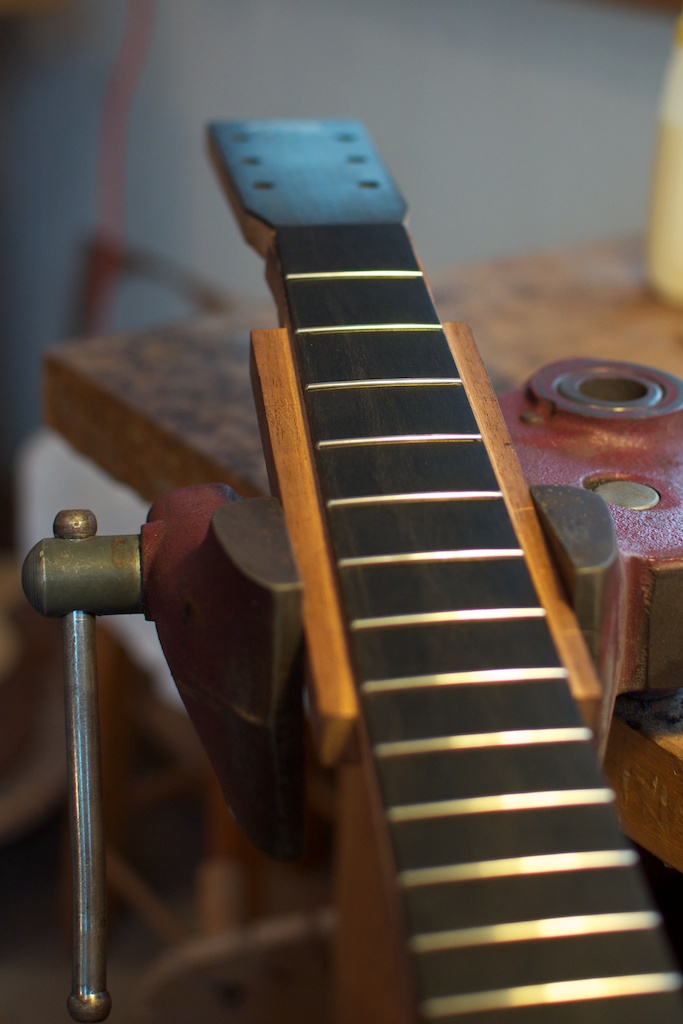
Much of the day was spent working with our fretboards. First we made sure they were level (i.e., did not have any dips or high points in them). Once we got that set (via planing the surface), we worked on the radius. The fretboard actually isn’t flat; it’s slightly curved. To complicate matters, that radius isn’t the same all the way down the neck (the curve is less severe further down the neck). So we planed our fretboards down some on the edges and then used a sanding block with that radius (12’ on the nut, 16’ on the end) build in. This created mountains of fine black ebony dust, but was very effective.
After things were in shape, sanded our fretboards until they had a near-glassy sheen to them, and then installed the frets. This wasn’t as difficult as I anticipated it would be. You simply put the metal fret in the slot, hammer it down a few times along the length of the fret, trim off the ends, and check the height. Most of mine seemed to be the right height, and those that were a tad high were knocked into place with another hit or two from the fret hammer. We also filed down the ends, but I’m sure we’ll take another pass at getting them all ready to go.
Towards the end of the day we began to shape the neck (i.e., cut the width to shape; still haven’t done anything with the shape of the back of the neck); one of tomorrow's big tasks will be getting the carving the neck.
We did one last application of shellac at the end of the day. I’m actually surprised that there wasn’t more “homework” to do tonight. I guess that means weren’t not behind (at least the majority of us) and are on track to finish on Friday.
Arrived at 7am, an hour for lunch, and done at 7pm. All in all, a relatively short day.